
i may have over-exaggerated a bit. (to allure you back) this is not an epic tale. this is, however, all about mystery and colonization. the colonization of bacteria, and how it mysteriously transforms milk into a thick, semi-solid state full of yumminess and healthiness.
last week i made my very own yogurt. well, i took pictures anyways. it is super easy - you can do it too!
here's how:
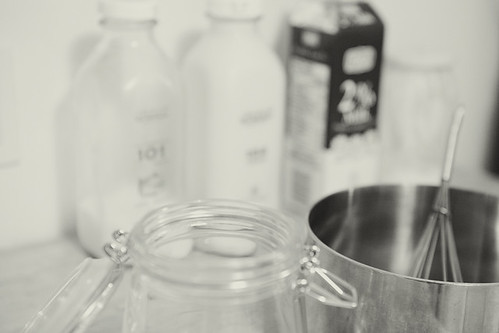 what you need:
milk (preferably organic whole milk)
a saucepan
a wisk
a container
a tablespoon or 2 of yogurt (unflavored, make sure it contains active bacteria)
a warm place in your house/ a container to keep your yogurt container warm
 measure your milk by pouring it into the container you will be using later on. the amount of milk you use = the amount of yogurt you will get.
pour milk into saucepan.
 put saucepan on high heat.
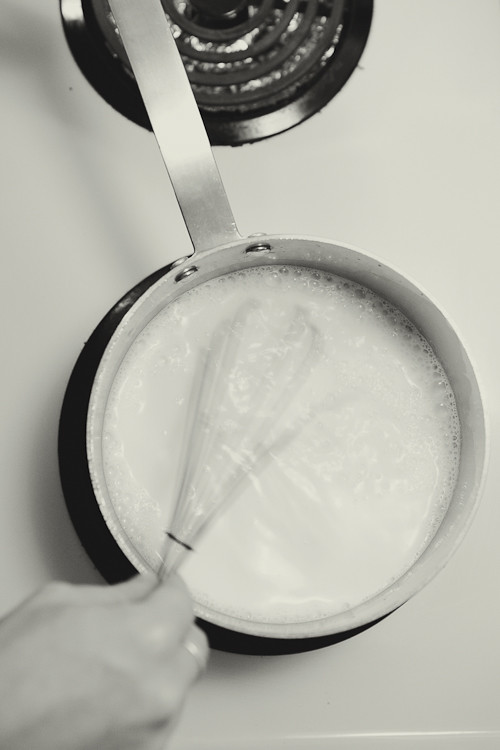 whisk your milk continuously as you heat it.
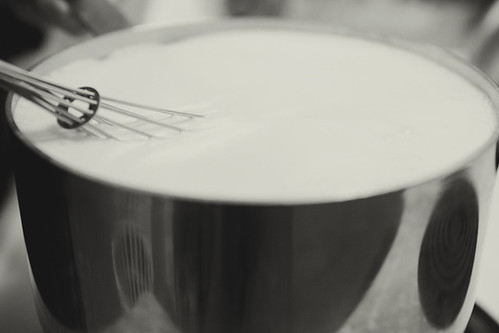 as SOON as it starts frothing (you will know because it will triple in size and want to spill over your saucepan), take it off the heat. OR, if you use a thermometer, you want it to reach 180 C, just before it boils.
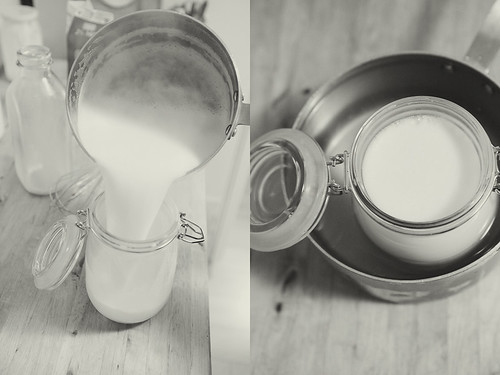 pour scalding milk into your container. you want to cool it down now to a temperature of 110 or 115 C. to quicken that process, set your container in a bigger container full of cold water and stir your milk constantly. the temperature drops quickly, so be careful. we didn't have a thermometer, so we checked by dipping a finger in. if your finger can stay in for 10 seconds comfortably (without burning), then you're good to go. remove the container from the water.
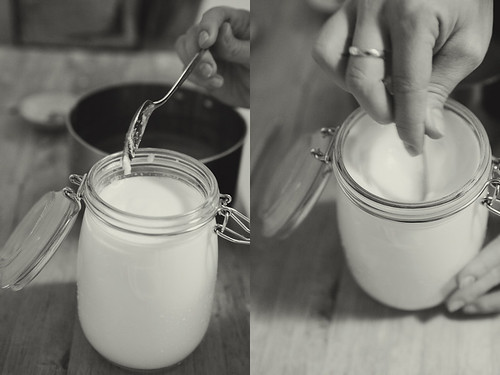 add your yogurt and stir.
(best to use fresher yogurt. the bacteria in yogurt close to its expiry date may have less active cultures.)
 close your container. now you want to keep it warm for 6+ hours. we wrapped ours up, and put a hot water bottle underneath to help with the warmth insulation. some sites suggest using a crockpot or a picnic cooler with towels or jars of hot water to keep it warm. the longer you keep it warm, the thicker and more sour it will be. check it at 6 hours, if it looks like yogurt & is thick enough, place it in fridge to cool.
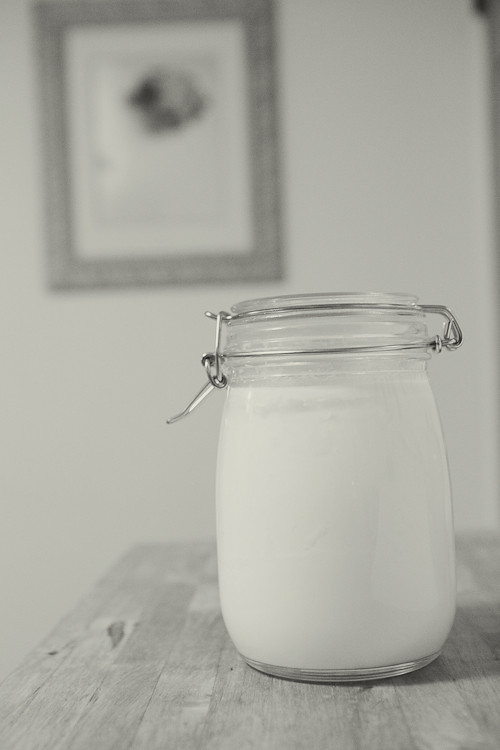 and there you have it. homemade yogurt!
here are some other helpful yogurt links:
granvilleonline.ca
homemade baby food recipes
2 comments:
Joey beautiful photos and thank you for the recipe. I will try it at home :)
thanks mildred! let me know if you try it and how it turns out!
Post a Comment